Are you looking to achieve professional-level results with your car detailing at home? This guide will walk you through the essential tools, step-by-step processes for DIY car detailing and painting, and tips for maintaining a showroom finish. You’ll learn how to select the right products, master proper techniques, and understand when it’s best to seek professional help. By following these methods, you can save money whilst still achieving impressive results for your vehicle’s appearance.
Key Takeaways
- Proper tools and products are essential for achieving professional results in DIY car detailing
- Regular maintenance, including washing and protection, is crucial for preserving a vehicle’s professional finish
- DIY methods can yield impressive results, but some situations may require professional detailing services
- Thorough preparation and attention to detail are key to achieving a high-quality finish
- Proper techniques and products help avoid common issues like swirl marks and overspray
Step-by-Step DIY Car Detailing
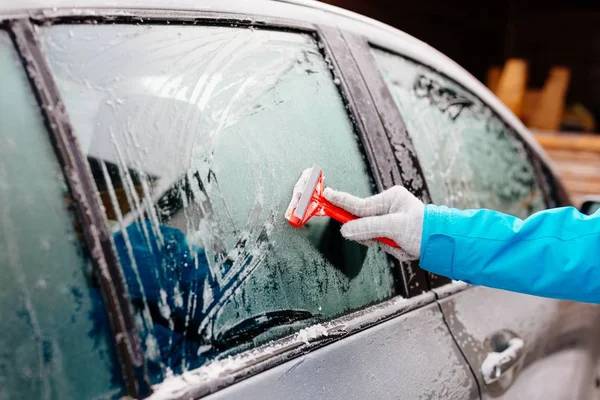
Exterior Cleaning and Decontamination
Begin your exterior cleaning process by parking your vehicle away from direct sunlight to prevent premature drying. Start with a foaming pre-wash solution to loosen dirt and grime, paying special attention to stubborn stains on your paintwork. Then, use a nylon brush to agitate the foam gently, ensuring you reach all areas without scratching the surface. This thorough decontamination step, combined with using a hose and isopropyl alcohol, sets the foundation for achieving professional-level results.
Polishing and Waxing Essentials
Start by selecting a quality polish suitable for your vehicle’s paint condition. Using a dual-action polisher or microfiber applicator pad, work in small sections across the surface. Follow with a wax or sealant to protect the newly polished surface, paying attention to often-overlooked areas like wheels and motorcycle fairings. Use silicone-free products to avoid interfering with future paint maintenance while working systematically to restore shine and enhance your vehicle’s aesthetic.
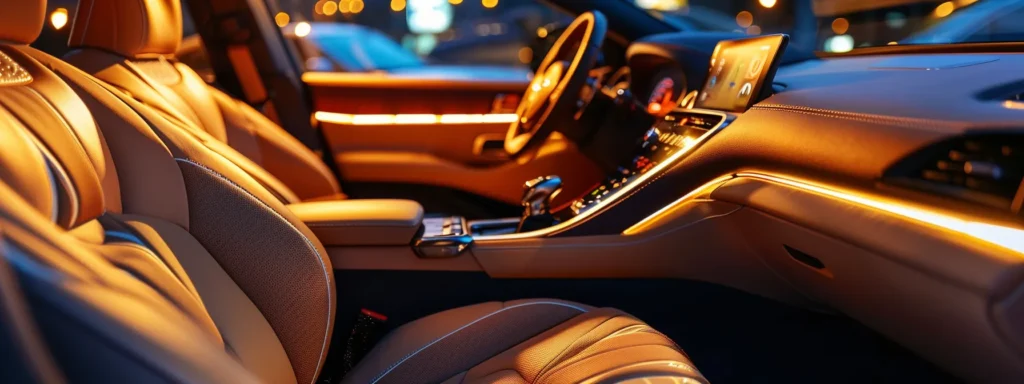
Interior Vacuuming and Surface Care
Begin your interior detailing by thoroughly vacuuming all surfaces, including hard-to-reach areas. Use a lubricant to ease the removal of stubborn debris from crevices, then apply a UV-protective solution to the dashboard to prevent fading and cracking. For leather seats, apply a color-matched conditioner and utilise a drill attachment for deep cleaning of surfaces. Keep a spray bottle of all-purpose cleaner handy for spot cleaning. Consider gentle paint correction techniques if you notice any imperfections on interior painted surfaces. Additionally, window tinting can provide extra protection for your interior from UV rays while enhancing the vehicle’s overall appearance.
Experience the Glosshaus Difference
Ride with confidence. Contact us now to schedule a professional detailing service.
Step-by-Step DIY Car Painting
Surface Preparation and Priming
To prepare your car’s surface for painting, start by thoroughly cleaning it with a degrease or specialised cleaner to remove any contaminants. Next, use sandpaper of varying grits to smooth the surface, progressing from coarse to fine. Clean the surface with a degrease, then sand the area starting with coarse grit and finishing with fine. Apply primer evenly, ensuring it’s suited to your vehicle’s material. Use high-quality, brand-name products and work in a controlled environment, avoiding extreme temperatures. This initial investment in proper preparation will yield professional results, even in challenging conditions like snow.
Applying Base Coats and Clear Coats
Begin applying the base coat after thorough surface preparation and priming. Use a high-quality paint shampoo to remove any remaining debris before starting. Apply thin, even layers of the base coat, allowing each to dry fully before the next. For optimal results, apply multiple thin layers rather than one thick coat. Once the base is completely dry, apply the clear coat using appropriate tools, such as a spray gun or brush for your application method. Pay close attention to achieving uniform coverage and avoiding runs or sags for a professional finish.
Touch-Ups and Corrections
When performing touch-ups and corrections on your car’s exterior, first use a vacuum cleaner to remove loose debris. Keep a bucket of clean water nearby for rinsing tools as you work. Apply touch-up paint carefully with a fine brush or applicator for precise coverage. If you encounter any issues with paint color matching, contact your insurance provider to ensure the repair doesn’t affect your policy.
Drying Time and Achieving a Professional Finish
Avoiding Swirl Marks and Overspray
To avoid swirl marks and overspray when cleaning your vehicle, use proper techniques and products. Apply cleaning solutions with a gentle, circular motion using a microfiber cloth to protect your new car‘s paint. When working with motor oil or other fluids, place a protective covering on surrounding areas to prevent overspray. Transport your vehicle to a shaded area for drying while allowing sufficient time to minimise the risk of water spots and ensure a professional finish.
Polishing for Gloss and Depth
To achieve professional-level gloss and depth, start by removing road debris and iron particles using a clay bar or iron decontamination product. Next, use a bristle brush to agitate stubborn contaminants before pressure washing. For optimal results in auto detailing, choose a dual-action polisher with appropriate pads and compounds. Work methodically across the vehicle’s surface, removing contaminants with clay bar or iron remover. Use a bristle brush for stubborn debris, then pressure wash to rinse thoroughly. Select a dual-action polisher with suitable pads, applying compound in small, overlapping sections. Finally, gradually refine the finish with finer polishing steps.
Checking for Imperfections
After completing your DIY detailing, examine your vehicle thoroughly for imperfections. Use a bright light to inspect the paintwork, headlamps, windshield, door jambs and under the bonnet. Pay close attention to hard-to-reach places and address any issues promptly with a microfiber towel and appropriate product. Remember, achieving a pro-level finish often requires patience and attention to detail, so take your time during this final inspection before considering the job complete.
Secure Your Detail Now
Availabilities are limited. Make a booking today or call us to get started.
Ensuring Long-Lasting Results: Maintenance Essentials
Regular Washing Protocol
Establish a regular washing protocol to maintain your DIY detailing results. Begin with a thorough vacuum of the interior to remove loose dirt and debris. Next, perform a decontamination wash to eliminate stubborn contaminants from the exterior. Use proper car maintenance techniques, such as the two-bucket method, to prevent swirl marks and scratches during washing. Additionally, consider using a paint protection film to shield your vehicle’s paint from road debris. Regular cleaning helps prevent the buildup of dirt and contamination, preserving your vehicle’s professional finish.
Protecting Against Environmental Factors
To protect your vehicle’s paintwork against environmental factors, apply a high-quality sealant or wax after each washing session. Use a pH-neutral soap to clean your car’s exterior, including the roof, to prevent damage from acid rain or bird droppings. If you transport cargo regularly, consider using protective covers to shield your paintwork from scratches. Remember to clean your vehicle’s undercarriage, especially after driving in harsh conditions, to prevent rust and corrosion. By incorporating these protective measures into your regular maintenance routine, you’ll maintain your car’s professional appearance for longer.
Interior Upkeep and Odour Prevention
To maintain your vehicle’s interior and prevent odours, regularly vacuum the trunk and apply a ceramic coating to protect surfaces. Use an oil-based air freshener for a long-lasting scent and spray fabric protectant on seats to guard against stains. Clean spills promptly to avoid lingering smells.
Regular Maintenance Schedule:
| Task | Frequency | Products |
|---|---|---|
| Vacuum interior | Weekly | Vacuum cleaner |
| Apply Ceramic Coating | Every 6 months | Interior ceramic coating |
| Use Air Freshener | Monthly | Oil-Based Air Freshener |
| Apply Fabric Protectant | Quarterly | Fabric Protection Spray |
When to Consider Professional Detailing
Extensive Paint Damage or Highly Soiled Interiors
When facing extensive paint damage or highly soiled interiors, professional detailing services may be necessary. While DIY methods can address smaller issues, deep scratches or oxidation often require specialised equipment and expertise.
Professional detailers possess the specialised tools and knowledge to address challenging situations such as bird droppings or stains from harsh cleaning products, deep interior stains requiring plastic-safe cleaners, and issues beyond what basic tools like a garden hose can handle. Their expertise ensures your vehicle is restored effectively without damaging surfaces.
Time and Equipment Constraints
However, just like many other professional automobile services such as dynamometer or towing services, Professional detailing services will be required due to time and equipment constraints. Examples include when dealing with complex tasks like graphene coatings or clay bar treatments, limited access to specialised equipment and products, and when time constraints prevent thorough DIY work. Tasks requiring specific expertise or skill levels, along with challenging surface conditions across tires, paint, and interiors, are best handled by professionals who have access to high-quality sealants and detergents, as well as the expertise to use them effectively.
Ensuring Topmost Quality
To ensure topmost quality in your car detailing, focus on thorough paint preparation and use meticulous hand-washing techniques. Pay close attention to carpet cleaning and ensure surfaces are rinsed thoroughly to prevent product residue. If achieving professional-level results proves challenging, particularly with complex tasks or delicate surfaces, professional detailing services can guarantee the highest quality outcome for your vehicle.
Conclusion
Transform your vehicle into a stunning masterpiece with expert-level care that goes beyond DIY limitations. Book your premium detailing service with Glosshaus Bespoke Detailing today, where our award-winning specialists combine advanced techniques and professional-grade products to achieve results that simply can’t be replicated at home. Contact our Sydney-based team now to experience our signature detailing services – trusted by luxury car owners across Australia for unparalleled attention to detail and lasting protection. Limited appointments are available for this month’s exclusive ceramic coating package.
Frequently Asked Questions
Essential DIY car detailing tools include microfiber cloths, wash mitts, car shampoo, detailing brushes, clay bars, polishing compounds, applicator pads, and a dual-action polisher. Quality products and proper techniques are crucial for achieving professional-level results at home.
For beginners, water-based acrylic paints are ideal. They’re easy to use, dry quickly, and clean up with water. Different brands offer quality starter sets with a range of colours suitable for various projects and surfaces.
To avoid swirl marks when washing, use a high-quality microfiber wash mitt and a two-bucket method. Start from the top, working in straight lines. Rinse frequently and dry with a clean microfiber towel. Always use proper car shampoo and avoid circular motion.
For a new paint job, typically two to three base coat layers are recommended. This allows for even coverage and depth of color. The exact number may vary depending on the paint type, color, and desired finish. Always follow the manufacturer’s guidelines for best results.
Yes, proper ventilation is crucial when painting a car at home. You need a well-ventilated area to disperse toxic fumes and overspray. Consider using a spray booth or working outdoors. Always wear appropriate personal protective equipment, including a respirator, to safeguard your health.
While minor scratches can be addressed at home, deep scratches often require professional attention. DIY methods may improve appearance slightly, but they rarely match the results of expert paint correction and restoration. For best results, consider seeking help from a professional car detailing service.
To maintain an odour-free interior long-term, regularly clean and vacuum your car, use air fresheners or odour absorbers, avoid eating inside, and address spills promptly. Consider professional detailing with deep cleaning and protective treatments for a lasting fresh scent.
While professional detailing often involves machine polishing, you can still achieve good results by hand. Use quality microfiber towels and apply car polish or compound manually, working in small sections. This method requires more time and effort but can effectively improve your car’s appearance.
Regular Waxing significantly enhances your car’s appearance and protection. It creates a glossy finish, shields paintwork from UV rays and contaminants, and makes cleaning easier. Consistent Waxing maintains your vehicle’s value and prolongs its pristine condition, making it a worthwhile investment for car owners.